WWW.JENNIFERLOVEGIRONDA.COM
  • HOME
  • ABOUT
    • ARTIST
    • TEACHER
    • MUSE
  • BLOG
  • CONTACT
  • GALLERY
  • Press
  • SHOP
  • STUDIO 2-110
  • #AngelDropART
  • HOME
  • ABOUT
    • ARTIST
    • TEACHER
    • MUSE
  • BLOG
  • CONTACT
  • GALLERY
  • Press
  • SHOP
  • STUDIO 2-110
  • #AngelDropART

Shrink Art Final Thoughts...

8/31/2016

0 Comments

 
​Working with shrink art this month has been quite a learning curve.  I remember making shrinky dinks when I was a little kid- but I'm 38 now so that was a long time ago.  I watched a few tutorials on-line and jumped right in practicing on recycled plastic with my fashion camp kids.  I would not say that I have mastered the material; however I have definitely improved and practiced.

A few things that I have noticed while working with this new (to me) material that I want to share in case anyone out there is also interested in playing around with shrink art.

(BTW- CLICK HERE to go directly to my series if you don't feel like searching 'round the ol' web site)
​

Picture
Yay, recycled jewelry!
Recycled Plastic:
I used a variety of plastics, from recycled to-go containers to special sanded surfaces ordered from Amazon.  If you can find a sturdy clear plastic container with the #6 by the recycling sign, go with that.  That seems to shrink pretty quick and even and is really thick once it cools.  I used that for making jewelry with the fashion camp kiddos and we all loved it.

(Also note, for that plastic I used a heat gun because I had not yet purchased the small convection oven.)  

There were little to no fumes with the convection oven compared to the heat gun. 
​

If you opt for the heat gun- VENTILATE! (ventilate in general...but especially with the heat gun)
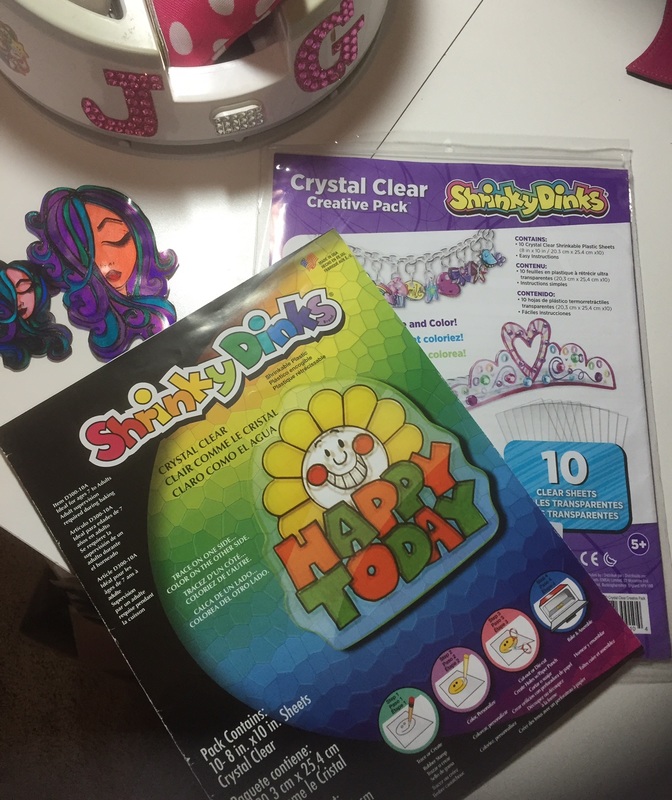
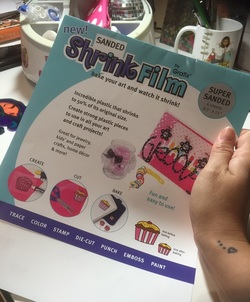
​
CLEAR PLASTIC:

I bought some basic, clear, shrinky dink film from Michael's with a coupon and really liked it.  In fact, it was my favorite.  Smooth surface- had a real 'stained glass' look when completed.  At my Michaels they sold two types of clear plastic, one was around $7 and the other was around $14.  (I used a coupon, of course, so got them for 40-60% off those prices)  I read on the packaging of the more expensive pack that you could actual add images via printer...but I didn't get into all that.  Also, the cheaper packet was pretty much the same- just marketed more to kids (there was a charm bracelet on the front and the color scheme was youthful) But really- same stuff.  Buy the cheaper one. 

​CONS: I was limited by what Sharpie Markers I had, with no option to go over them with Prismacolor.
Picture
From Michael's- these were my fav!
PictureOrdered from Amazon- not bad.
​SANDED PLASTIC
I also ordered some sanded plastic sheets...and I have mixed reviews.  I like the way the Sharpie colors looked on the frosted surface, seemed even brighter.  And because one side was sanded, I could use Prismacolor colored pencils on top of the Sharpie for a little more color depth.  But once baked the surface was pretty grainy on the sanded side- not too bad if you flip the piece to the back, though.  Baking the sanded plastic was fine, no real issues.

​WHITE PLASTIC
This was my least favorite plastic to work with.  By least favorite...I mean that I hated it.  It seemed super-streaky when I was going over it with Sharpie; I am sure due to the opacity.  (Especially when you compare it to the sanded and clear plastics) Not only that- I didn't like the way that it behaved during the shrinking process.  When I baked the white plastic it really seemed to shrink fast, and curl almost too fast for me to intervene with a spatula or chopsticks, which was my 'save' for the other plastics.  Not only that, but I wasn't crazy about the thickness of this plastic compared to the others.
Picture
Gurl, NO.
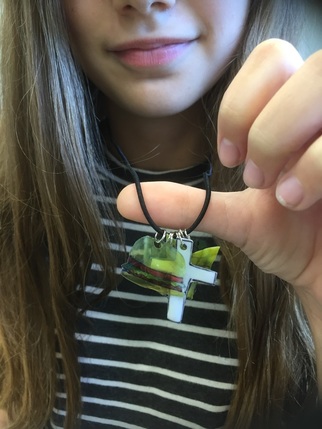
Going forward, if I create more shrink art pieces I will work with clear or sanded- or heck, maybe just the recycled plastic!
​I enjoyed drawing the pieces more than the actual baking process, to tell you the truth.  I mean, the first batch or two I was like, 'oooooh, ahhhhh'. But after that- kinda felt like a chore. Keep in mind I don't like to even cook food (I prefer cleaning to cooking) so that might be part of it.  I was always happy with just the pieces pre-bake...then stressed during the baking/shrinking process...and then many times a little frustrated after it was all said and done.  I re-did almost my entire first week of work because I was so shocked by how much the pieces actually shrank...and after that I just tried my best to 'fix' any issues as they happened- hence my chopstick and spatula method for trying to jump in an help guide the shrinking process.  I didn't catch it a few times; there were some pieces that started to fold onto themselves in the convection oven.  I thought about re-doing them...then just decided to let it be...and to let it be a part of the learning process.
Picture
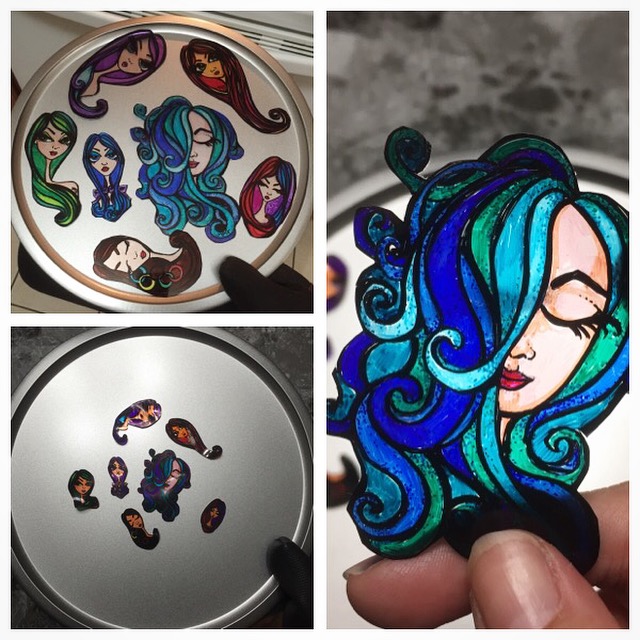
The shrink just got REAL.
Am I am master shrink artist? '_______________ (insert curse word of your choice) NO!'  Will I keep making shrink art?  Yeah, probably.  Mainly for small jewelry pieces.
 
And that brings me to this-how do I display them?  I decided early on NOT to punch holes in my daily works, I was adamant that I did NOT want them to become pendants, etc.  I wanted them to be small works of art.  In my mind I think I was thinking of some type of clear Plexiglas display, so that the light could shine through.  But then the issue is still how to attach them even if I find the frame that I want.  I know that I can always attach a hanger/wire with some clear glue...so it is still an option.  And then a tiny voice offered up another idea.
​Nope, not a tiny voice in my head...a real one- my private art student, Dakota.  She mentioned they would make fun ornaments.  I started to envision the gals with the flicker of white lights behind them...and loved the idea.  I usually have a tree in my studio- looks like I have some one-of-a-kind ornaments to hang on it this year!

​So...I did learn some new things this month.  When I wasn't stressing about the shrink factor and the fact that I wasn't posting final pics throughout the process...yeah, in between all that I had fun.


Picture
My lil' muse!
0 Comments

Your comment will be posted after it is approved.


Leave a Reply.

    Author

    ...just a gal trying to get this art out of my soul to share with the world on a DAILY basis...no big deal...check out my ramblings!-JLG

    Picture
    Picture
    Picture


    ​Archives

    January 2021
    December 2020
    November 2020
    October 2020
    September 2020
    August 2020
    June 2020
    May 2020
    April 2020
    March 2020
    February 2020
    January 2020
    December 2019
    November 2019
    October 2019
    September 2019
    August 2019
    July 2019
    June 2019
    May 2019
    April 2019
    March 2019
    February 2019
    January 2019
    December 2018
    November 2018
    October 2018
    September 2018
    August 2018
    July 2018
    June 2018
    May 2018
    April 2018
    March 2018
    February 2018
    January 2018
    December 2017
    November 2017
    October 2017
    September 2017
    August 2017
    July 2017
    June 2017
    May 2017
    April 2017
    March 2017
    February 2017
    January 2017
    December 2016
    November 2016
    September 2016
    August 2016
    July 2016
    June 2016
    May 2016
    April 2016
    March 2016
    February 2016
    January 2016
    December 2015
    November 2015
    October 2015
    September 2015
    August 2015
    July 2015
    June 2015
    May 2015
    April 2015
    March 2015
    February 2015
    January 2015
    December 2014
    November 2014
    October 2014
    September 2014
    August 2014
    July 2014
    June 2014
    May 2014
    April 2014
    March 2014
    February 2014
    January 2014
    December 2013
    November 2013
    October 2013
    September 2013
    August 2013
    July 2013
    June 2013
    May 2013
    April 2013
    March 2013
    February 2013
    January 2013
    December 2012
    November 2012
    October 2012
    September 2012
    August 2012
    July 2012
    June 2012
    May 2012
    April 2012
    March 2012
    February 2012
    January 2012
    December 2011
    November 2011
    October 2011
    September 2011
    August 2011
    July 2011
    June 2011

    RSS Feed

Proudly powered by Weebly