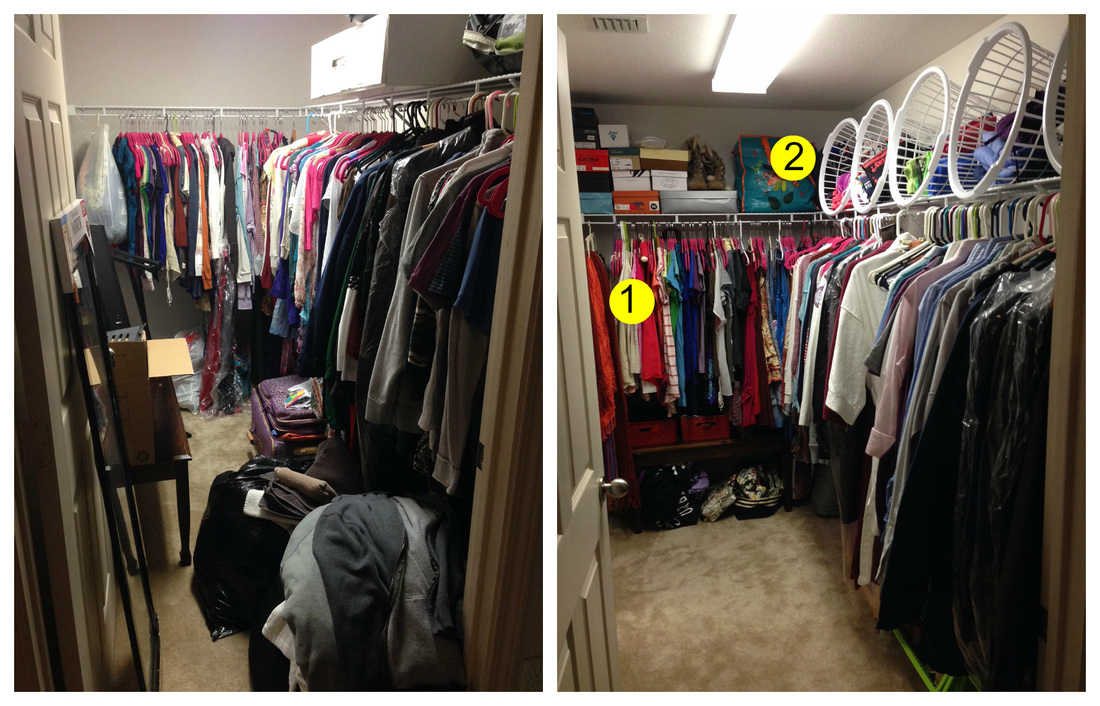
The before, shown on the left. Shaking my head looking at all that wasted space, especially up top!
On the right, the 'after'. We took everything out of the closet (yep, EVERYTHING) Step 1: Its all about sorting. (Cost, Nada) Here is how we seperated things.
Separating by type not only makes it easier to find certain items but it also controls the space underneath i.e. if you put all your shirts together you will have an 'even' space under the area where you can add shelving, etc. Then within each category, we did color sorting, ROYGBIV. Step 2: Use your overhead space!!! (Cost, $5) Next up, we had all this unused space at the top. In my own closet I use white crates turned on their sides. I can keep items separated and if I need to move anything just take down the whole crate. Another bonus, you create an additional 'shelf' above the crates...for more storage! Sometimes the crates can be a little hard to come by...for me at least because I am picky. So for this closet re-vamp we just went to the Dollar Tree and bought five white clothes baskets for Jen's t-shirts (separated into two baskets according to colored tees and neutral tees), one basket for bathing suits, another basket for scrubs and the last one for random gloves and such. Again, if you want to move them you just pull the whole basket down. Jen and Jake liked the fact that you could see everything in the open basket. ...that's the 1-2 closet revamp!
0 Comments
Your comment will be posted after it is approved.
Leave a Reply. |
AuthorArtist and Art Teacher 

|
 RSS Feed
Proudly powered by Weebly